VAIL’s observer mode, also known as the spectator or caster camera, allows you to spectate matches for tournaments and content creation. In this article we’ll cover how to launch the observer mode, the basic controls, and all of the advanced features like customizing team logos and setting up camera hotkey locations.
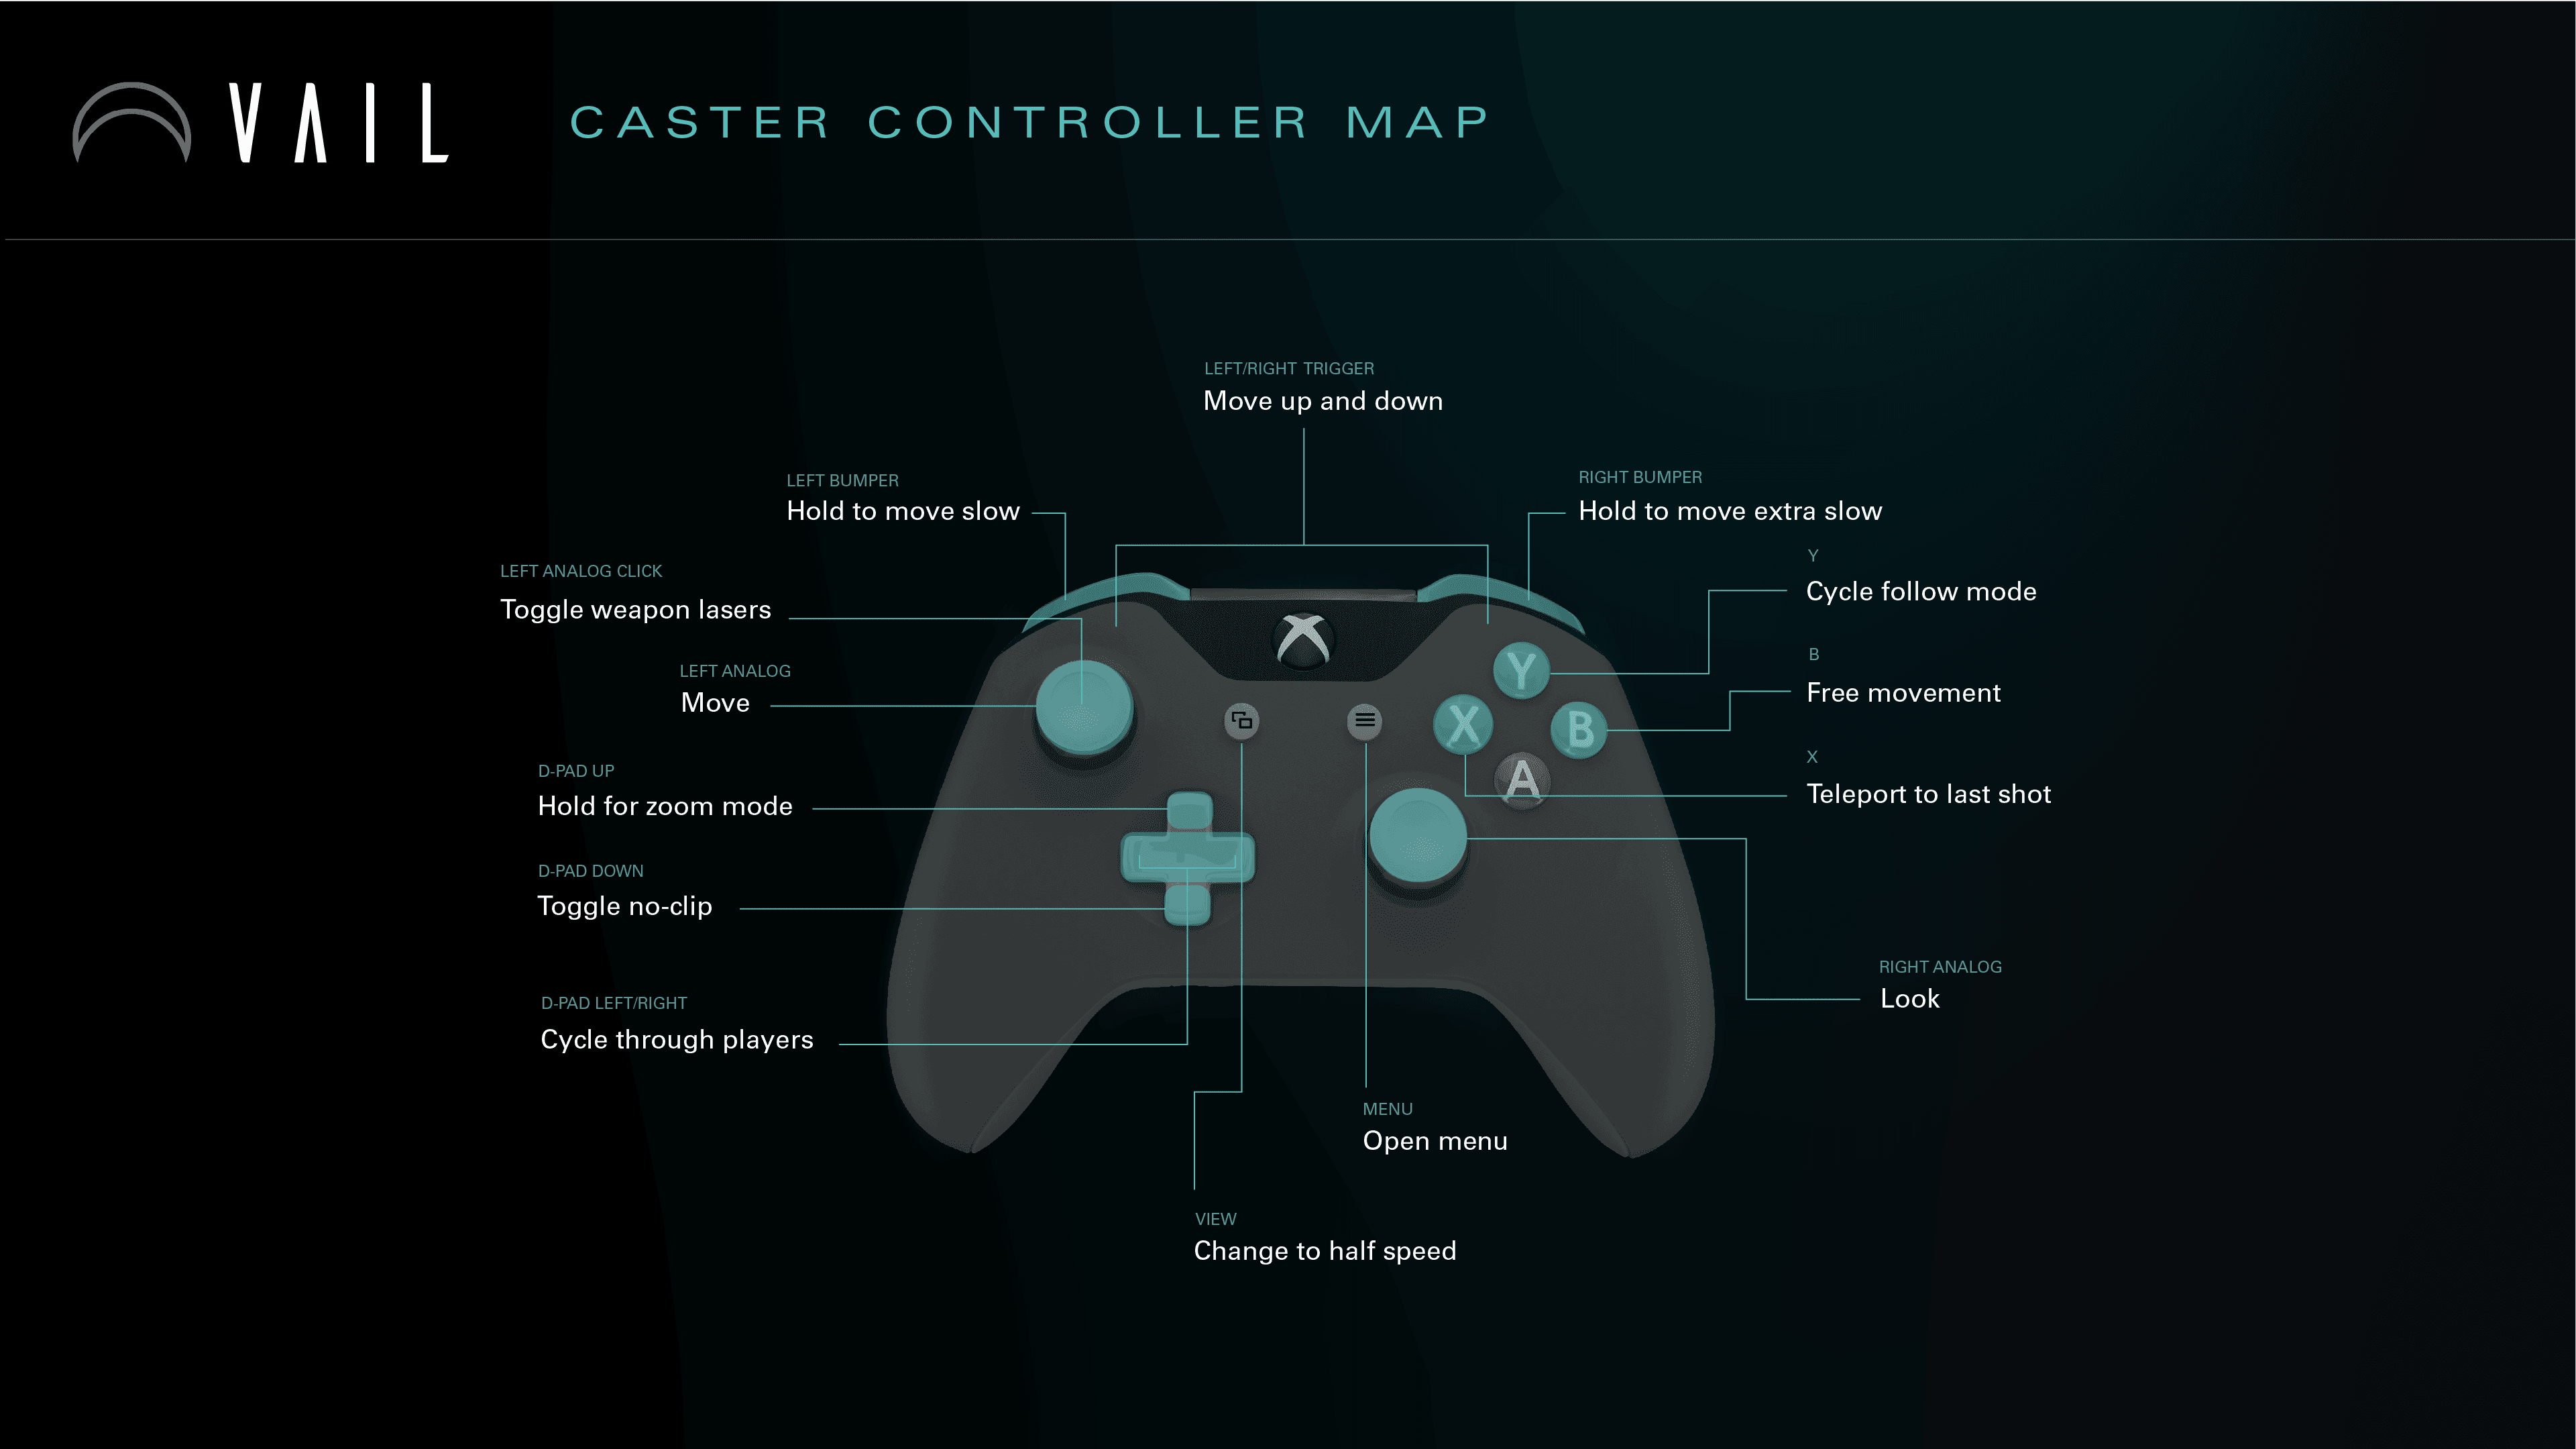
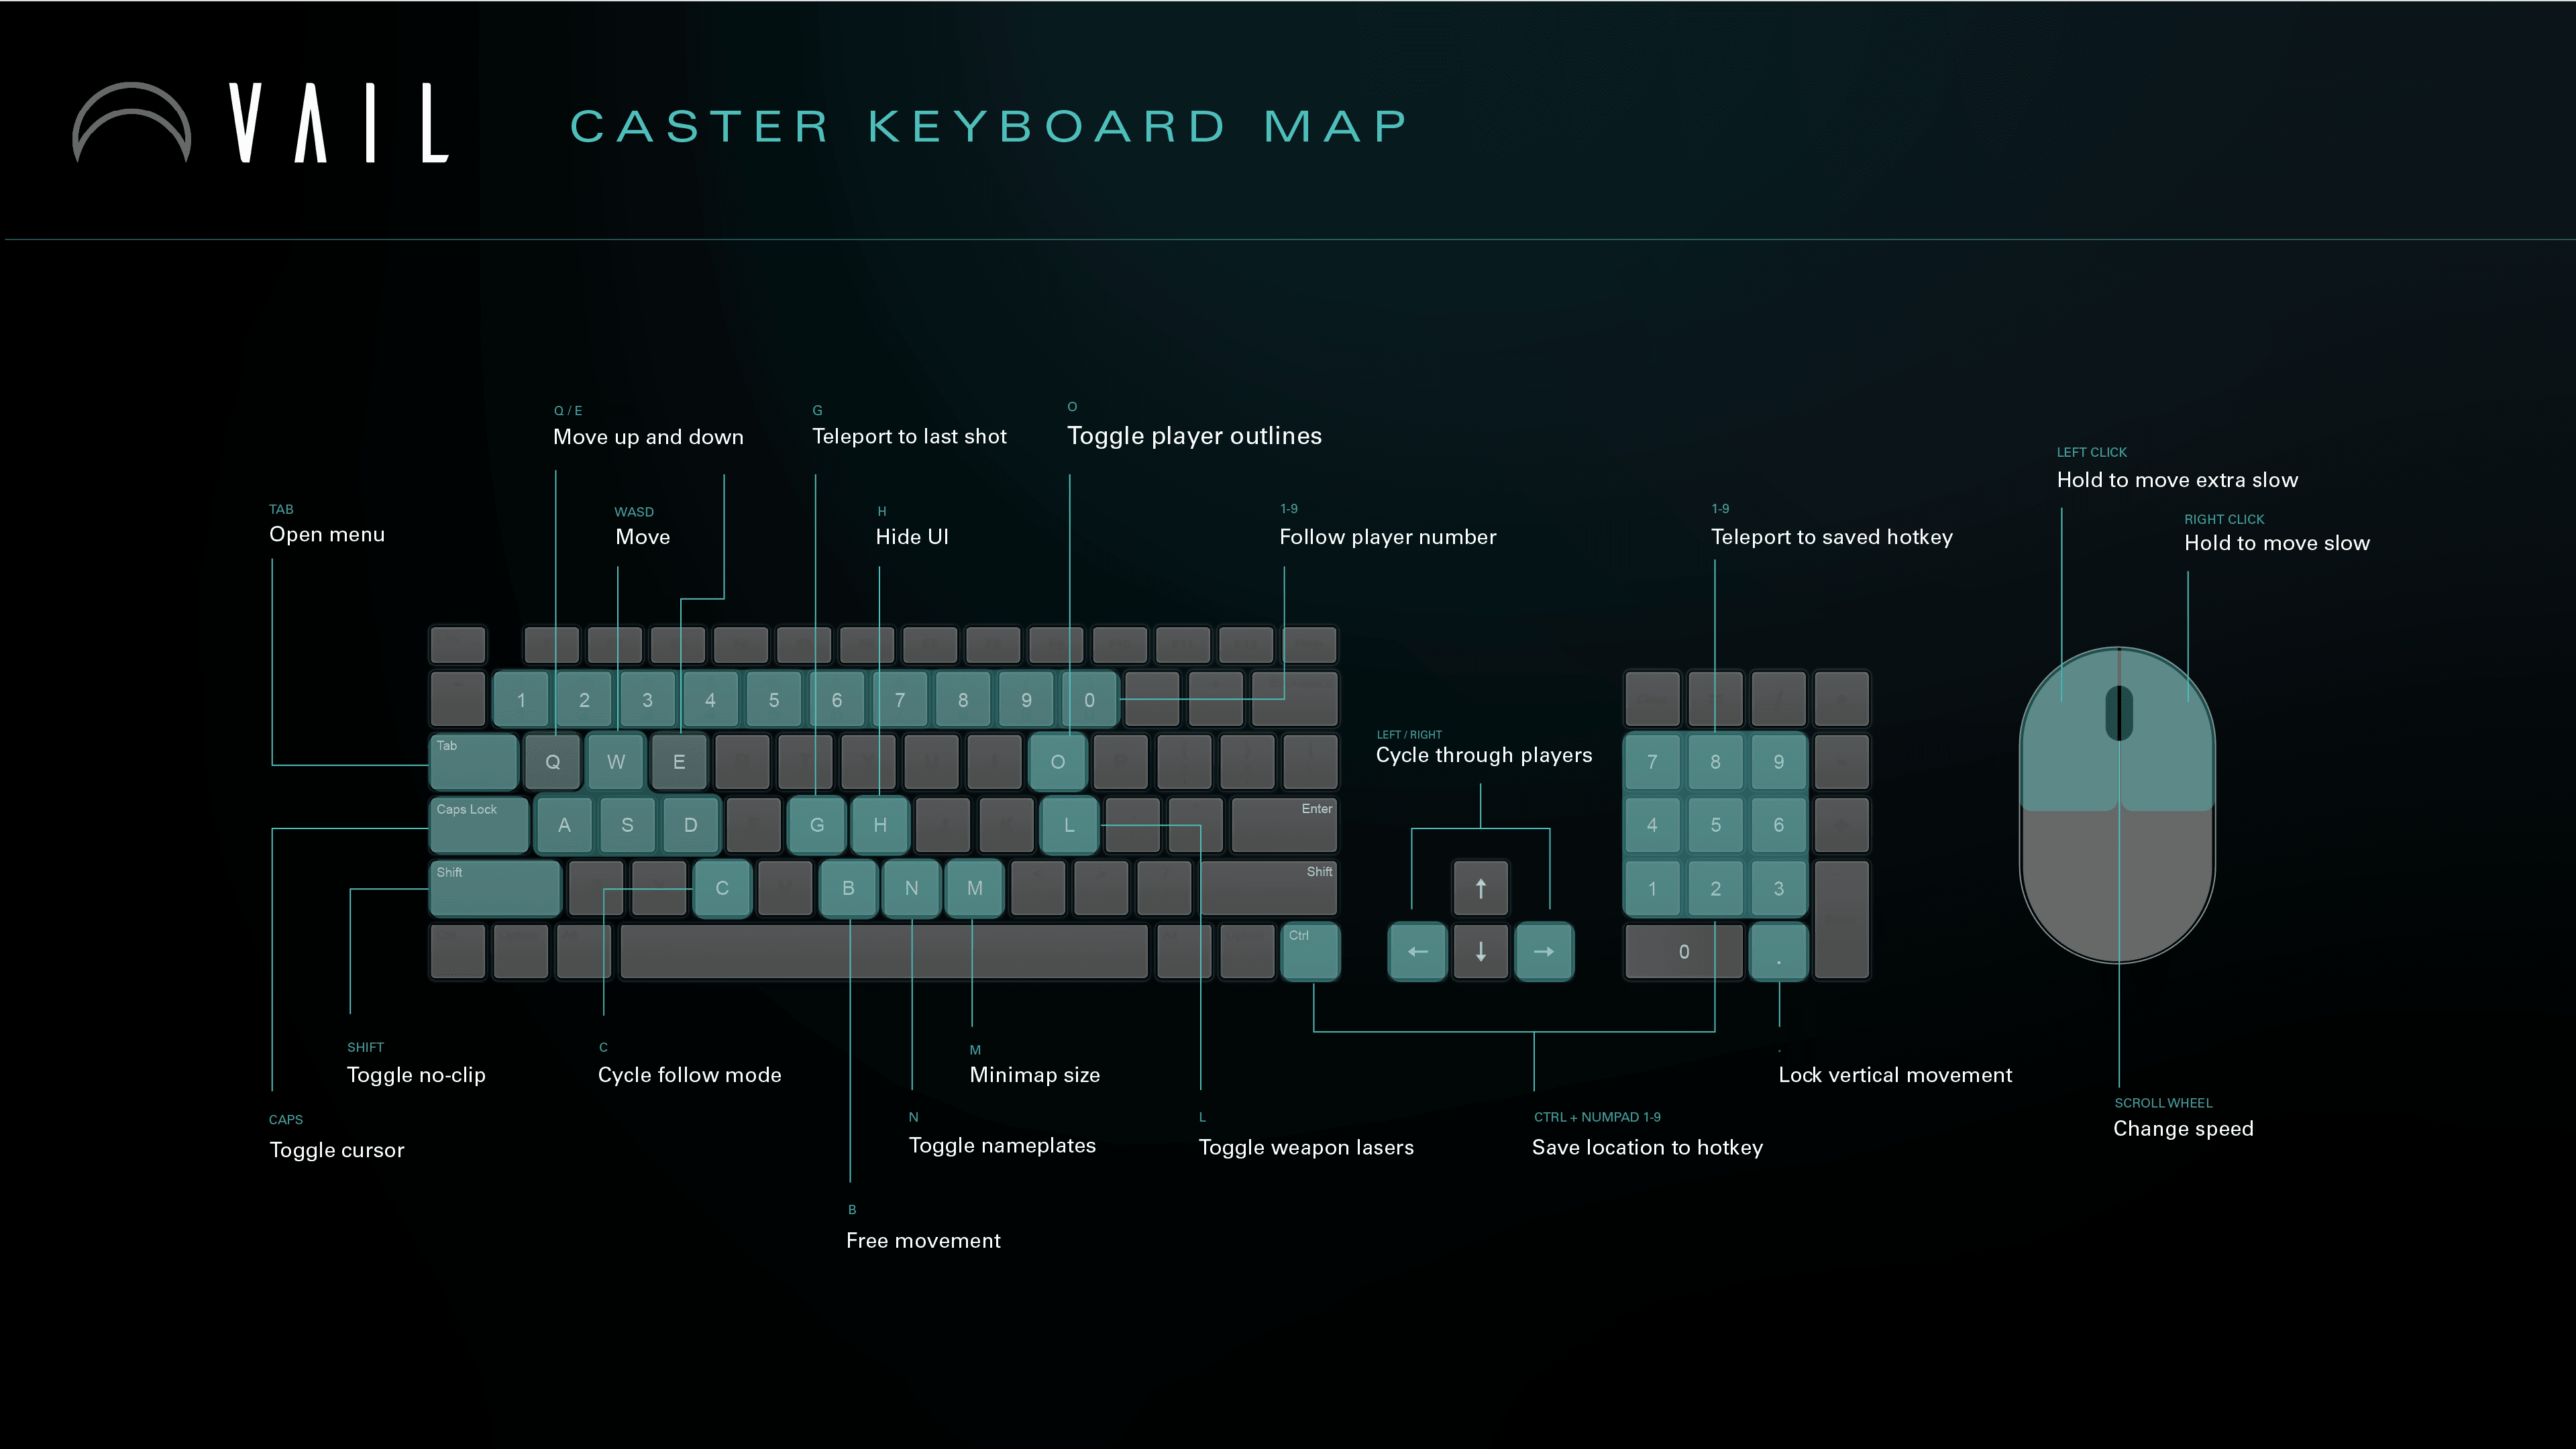
Additionally, the full list of controls will be listed at the end as a quick reference to have on hand while using the observer mode.
How to Launch Observer Mode
To launch the observer mode through steam simply right click on VAIL in your Steam library, select properties, go to the general tab, and add the following launch options: “-nohmd -observer“
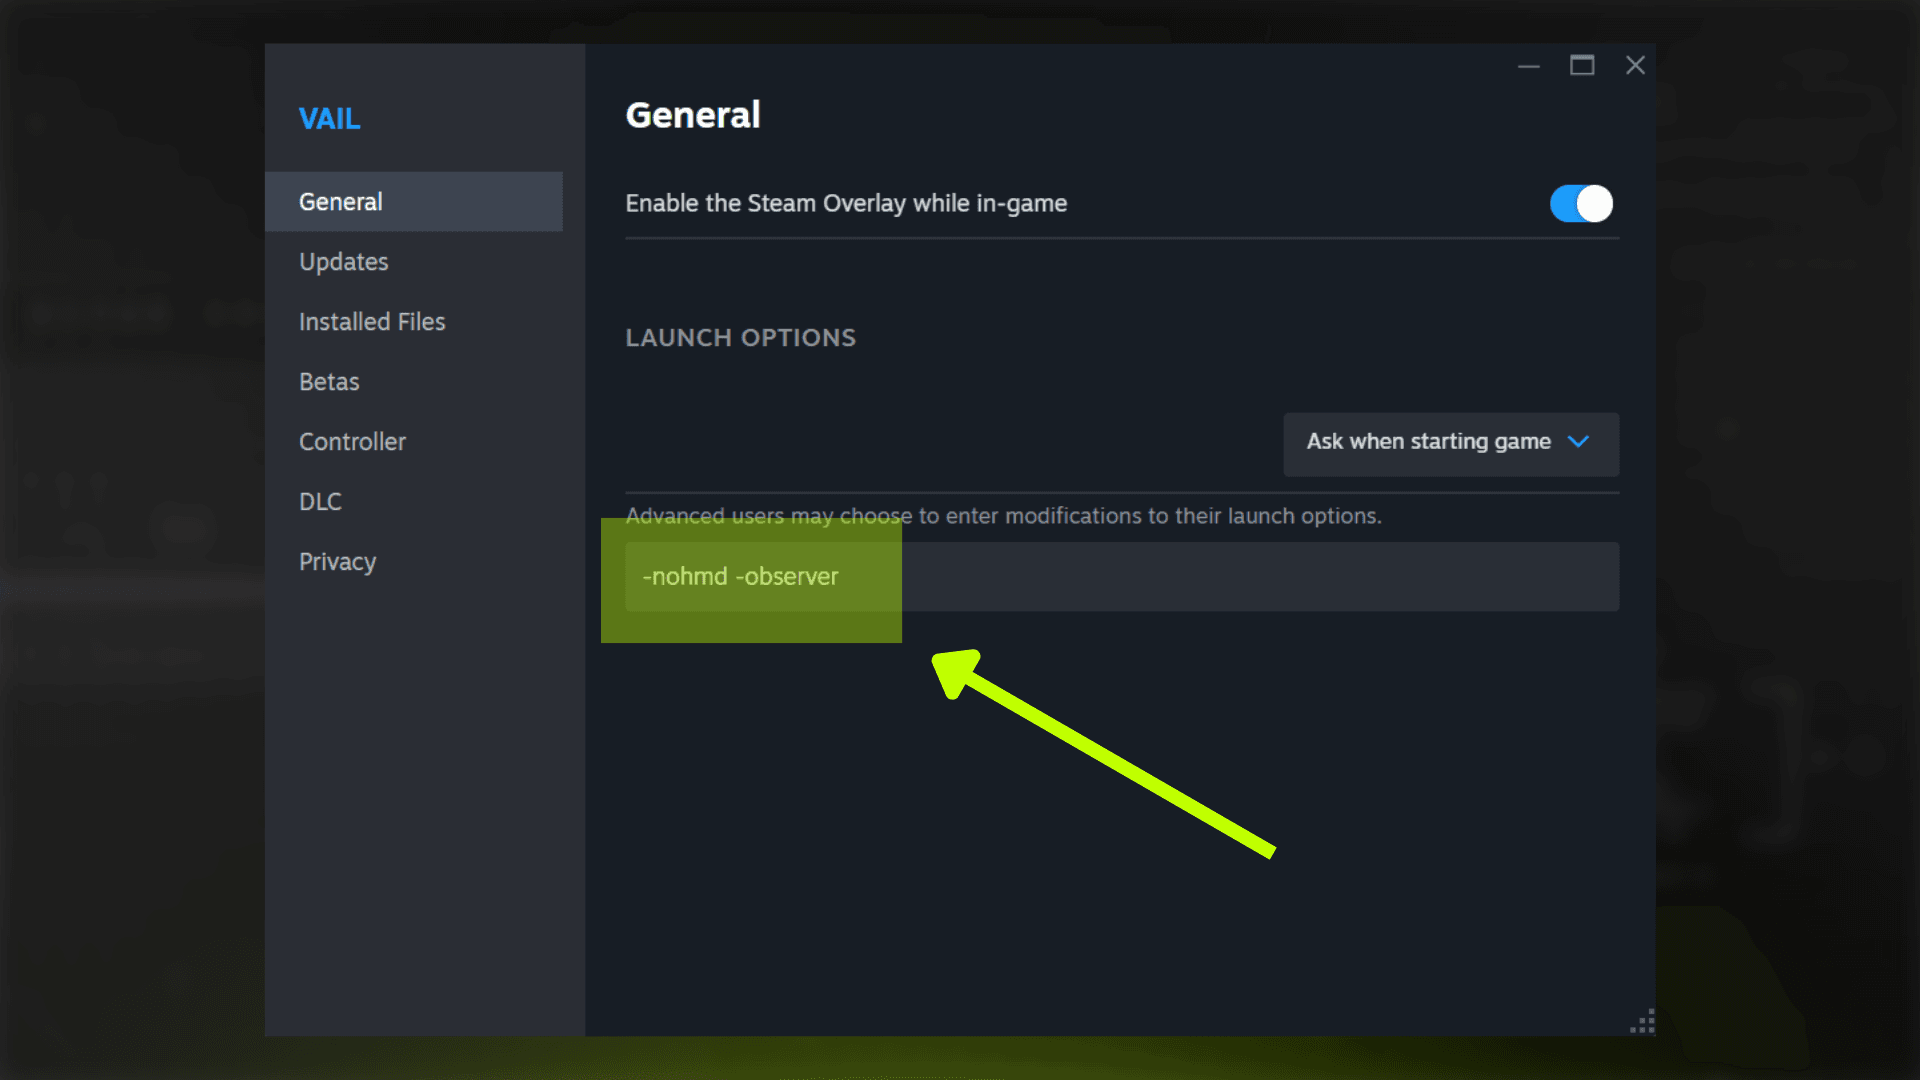
With that added, you can launch VAIL in any mode and it will open in the flatscreen observer mode. To go back to VR, just erase the two launch options.
Basic movement controls
Once you load into the game, if you find yourself stuck and unable to move, just hold left click for a couple of seconds. This is a minor issue that would only happen if you’ve never played VAIL before on Steam, and holding left click will fix it.
You can easily move around by using a mouse and keyboard or a gamepad controller. I recommend using both depending on the situation. A gamepad is best for smooth movement and rotating shots while the keyboard will have some controls and toggles that are unavailable on a gamepad.
Moving around with mouse and keyboard is done with WASD and your mouse, just like any other game. Additionally you can press “Q” to move down and “E” to move up. Gamepad controls are also as expected with the thumb sticks for basic movement and you can use the triggers to move up and down.
Changing Movement Speed
There are a couple of ways you can change your movement speed, which is useful for getting smooth slow and cinematic shots or speeding up to quickly move across the map and get to the action.
With mouse and keyboard you can hold right click to slow down a bit and left click to slow down a lot. You can also use the scroll wheel or the “+” and “-” keys on the keyboard to have more granular control over your speed.
On controller you can use left bumper to slow down a bit and right bumper to slow down a lot. You can also toggle half speed by pressing the view button on Xbox or its equivalent button on other controllers. You can also control your rotation speed for controllers by opening the in-game menu with "tab,” going to the settings page, scrolling down to the bottom of the controls tab, and changing “spectator turn sensitivity.”
Other Controls
In addition to those basic controls, there are some additional toggles that will affect how you move around the maps.
Period will lock you on a plane so that when you move forward and back you stay at the same height. This is extremely useful for overhead shots looking down on players. With this on, you can still use Q and E or the controller triggers to move up and down as needed, but moving forward and back will keep you at the same height no matter what direction you’re facing.
Left shift or down on the d-pad will toggle noclip mode, allowing you to move freely through objects around the map. This is useful if you need to get to the action as fast as possible and you don’t want anything stopping you.
By holding “up” on a controller’s d-pad you can enable zoom mode which allows you to use left and right trigger on the controller to zoom in and out. This is only temporary and it will reset when you let go of “up” on the d-pad, but it can be useful to quickly zoom into the action or to temporarily increase your FOV.
How to open menu and join a match
Once you’re comfortable with all of the movement options, you can easily join a game by pressing tab to open the main menu.
If you want to hide all of the UI, you can toggle it on or off by pressing “H” at any time. This will also hide the main menu, so if you can’t figure out how to get to the menu again, press H to make sure the UI isn’t hidden.
In addition to this, there are a few toggles that affect what you’ll see while spectating:
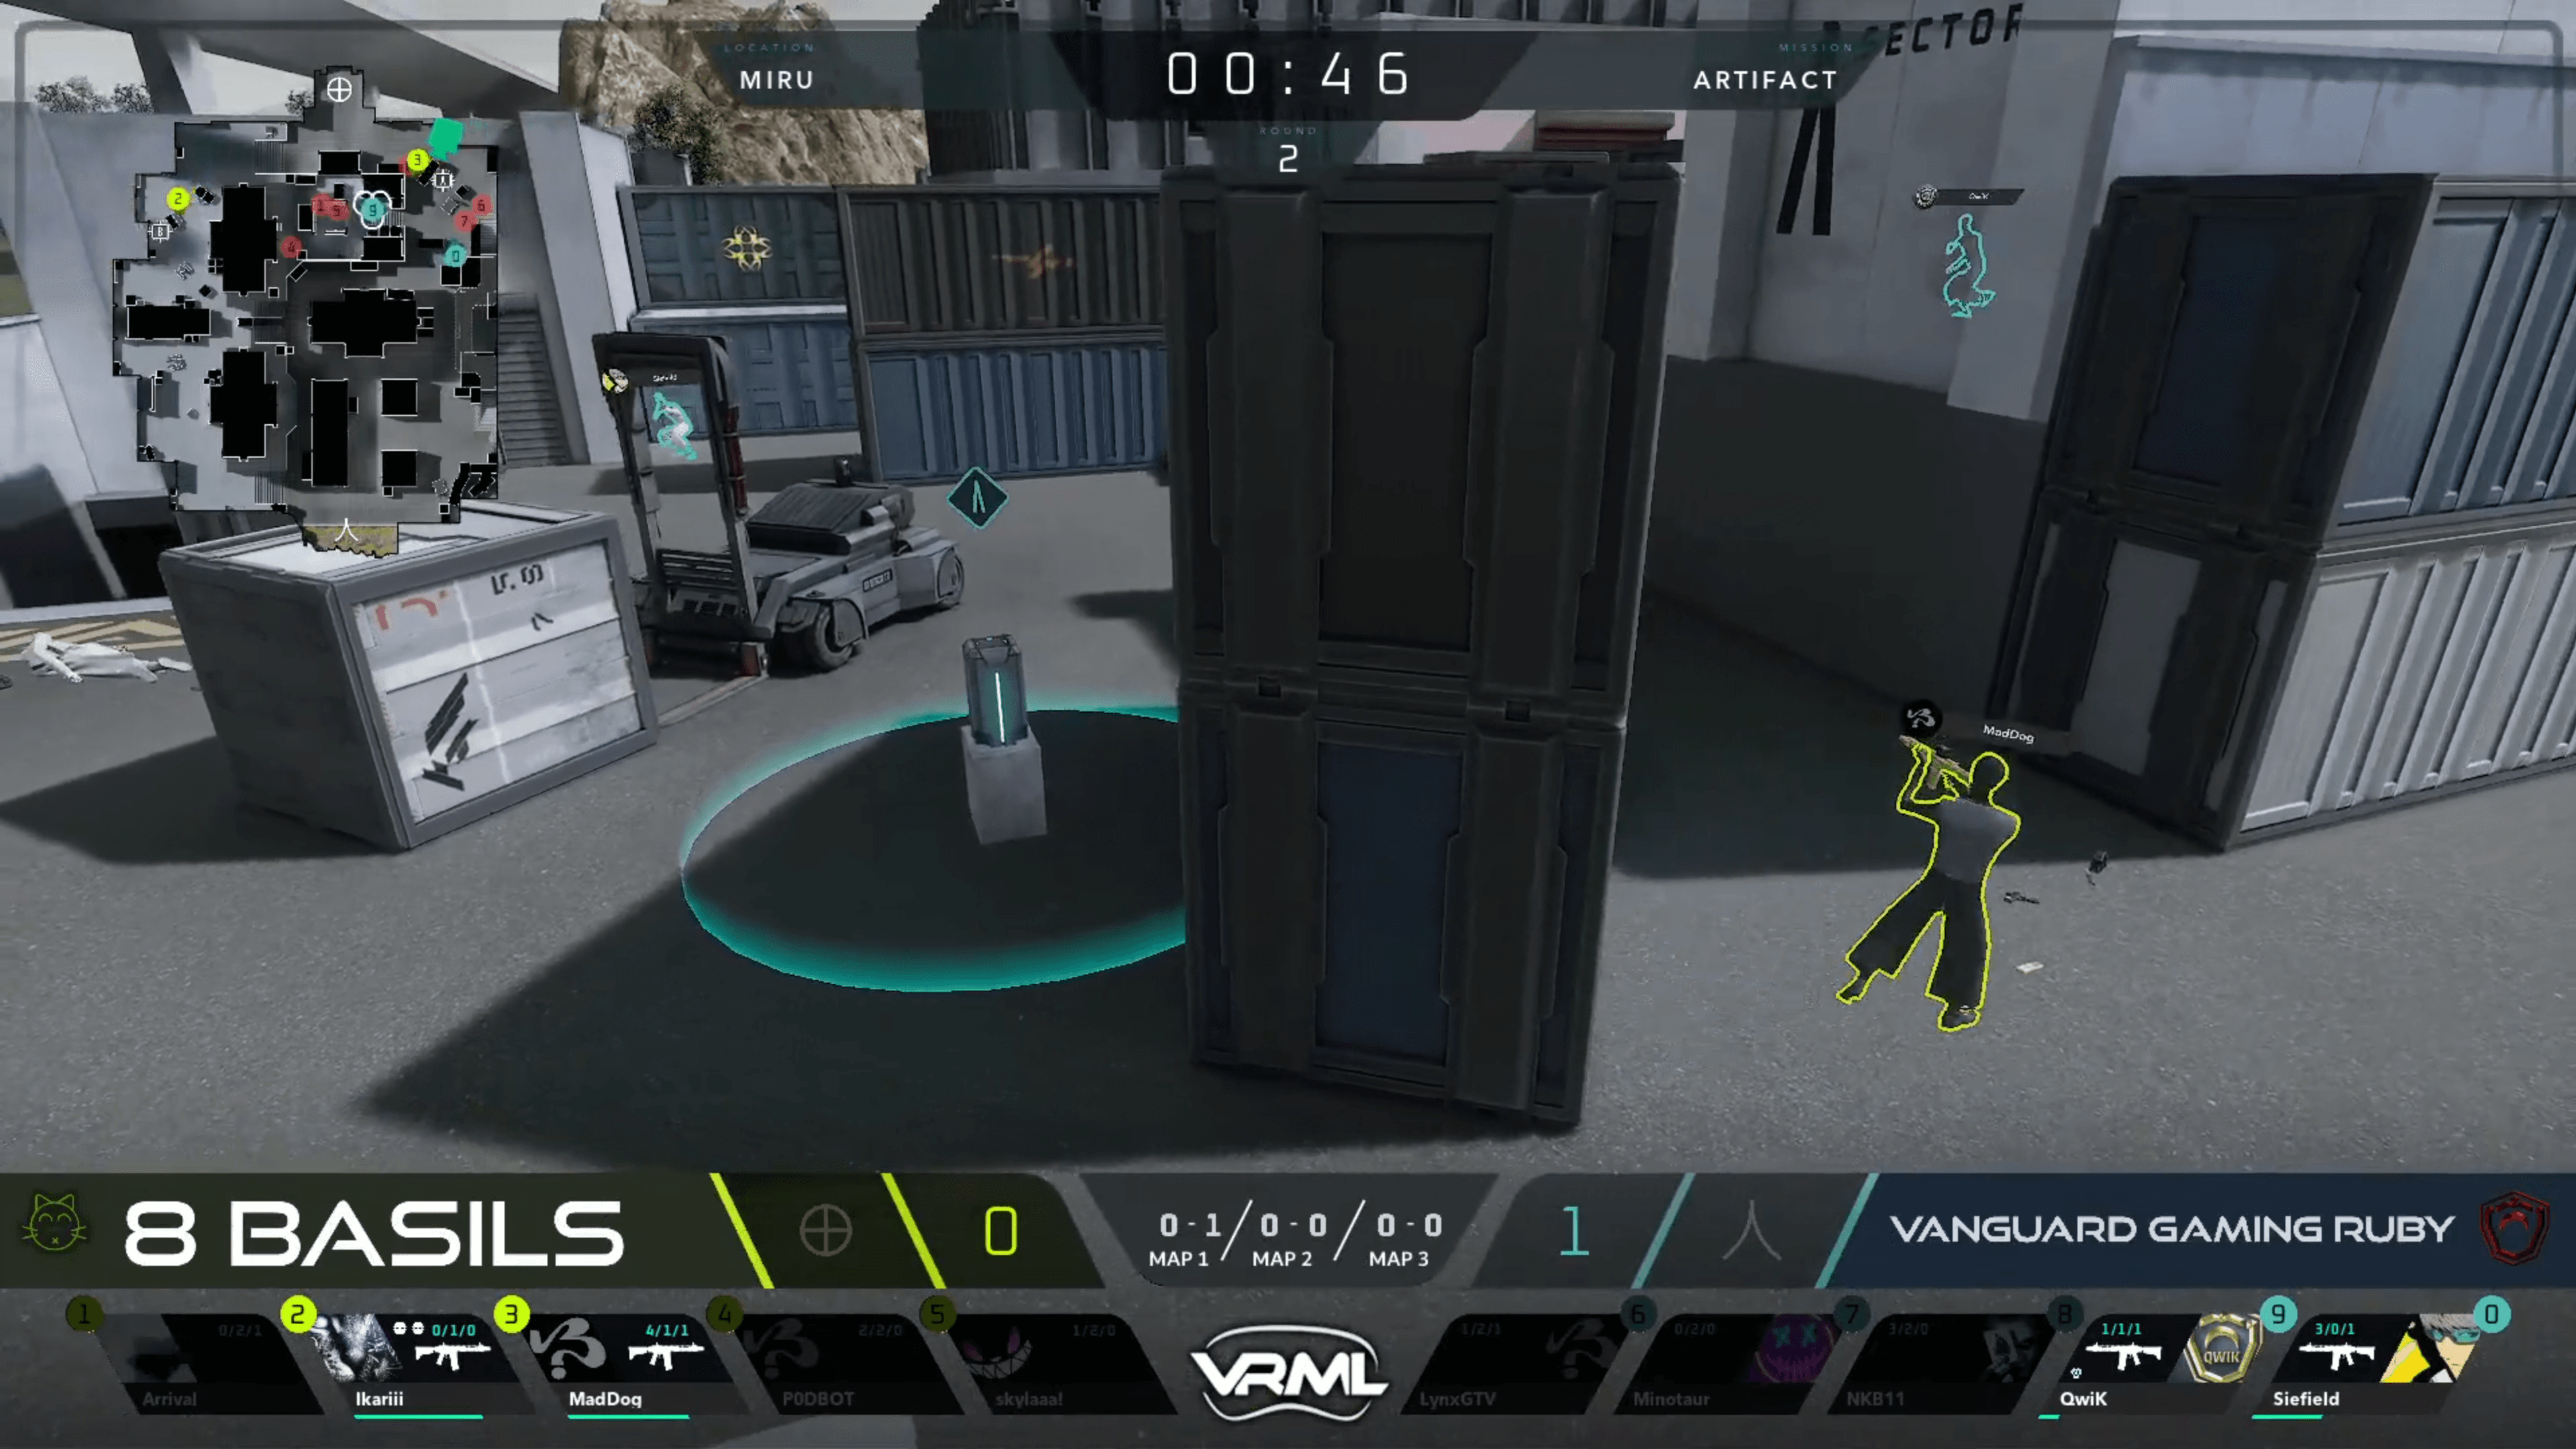
- “L” on keyboard or left thumbstick press on gamepad will toggle firearm lasers, also known as gun traces. These are used to visualize where players are aiming
- “O” on keyboard toggles player outlines on and off. Outlines are colored based on team factions, and are visible through walls.
- “N” on keyboard toggles player nameplates on and off.
- “M” on keyboard will toggle between the large and small mini map for maps that support a mini-map.
Following players
In addition to the basic movement controls, you can spectate specific players in first or third person view.
- Each player corresponds to a number on your keyboard, as shown at the bottom of the caster UI. Simply press that number (not on the num pad) and you’ll start spectating that player in first person view.
- You can also cycle through players by hitting left or right on your keyboard or on your d-pad on controller
- While spectating a player, you can press “C” on the keyboard or “Y” on an Xbox controller to switch from first person mode to third person mode, then back to free camera mode.
- You can also press “B” on keyboard or Xbox controller at any time to go immediately back to free camera mode.
- And to make sure you don’t miss any of the action, you can press “G” on keyboard or “X” on Xbox controller to spectate the last player who fired a shot.
Setting Team Names and Pictures
If you’re hosting tournaments, you’ll want to replace the default team names for the names of the actual teams competing. This is easily done by pressing the caps key to toggle on the cursor, then selecting REYAB or COLONIST and typing in the new names.
In addition to this, you can show team logos or icons next to the names. All you have to do is have a .png image with the exact name of the team and put it in a folder called “TeamImages” in your game’s install location.
Just type into the windows search bar "%AppData%" and hit enter to open up the AppData folder. This will open automatically to the Roaming folder in AppData, which isn't exactly where you need to go. So just go back one folder to the actual AppData folder, then go to Local, VAIL, Saved, and then create a folder called "Caster" and within that folder create one called "TeamImages." Then all you need to do is drop all of your team logo and images into this folder and it will automatically find the correct image when you input that team's name into the caster UI.
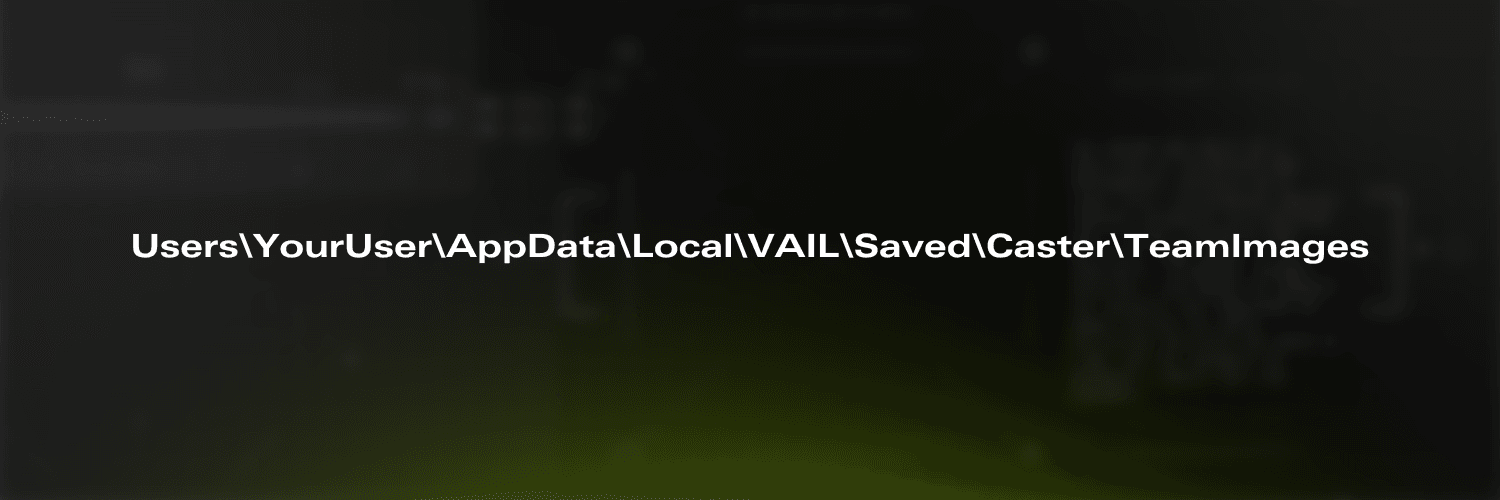
So for example, if the team is called “Team VAIL” just drop a .png image called “Team VAIL.png” into the TeamImages folder you created, then go into the caster UI and type in the team name, “Team VAIL” and hit enter and the icon will appear.
You can also swap sides for the team names and icons by pressing the “Home” key on your keyboard. This is useful for Artifact matches where teams will swap sides halfway through the game.
Setting Preset Camera Spots Around the Map
Another useful tool is the ability to set preset camera locations around maps that you can teleport to with hotkeys.
For this to work, you will need a number pad on your keyboard. Then, while spectating, press “left ctrl” and any number on your num pad. This will save your immediate location to the number you picked. So now if you fly around, you can immediately travel back to that location by pressing that number on your num pad.
This is extremely useful for tournament casters who can setup preset camera locations at team spawns and objectives. Additionally, these camera location hot keys are saved to a JSON file in your game’s install location that you can then share with others to use.
Just type into the windows search bar "%AppData%" and hit enter to open up the AppData folder. This will open automatically to the Roaming folder in AppData, which isn't exactly where you need to go. So just go back one folder to the actual AppData folder, then go to Local, VAIL, Saved, and then create a folder called "Caster" and within that folder create one called "CameraBookmarks" if there isn't one already.
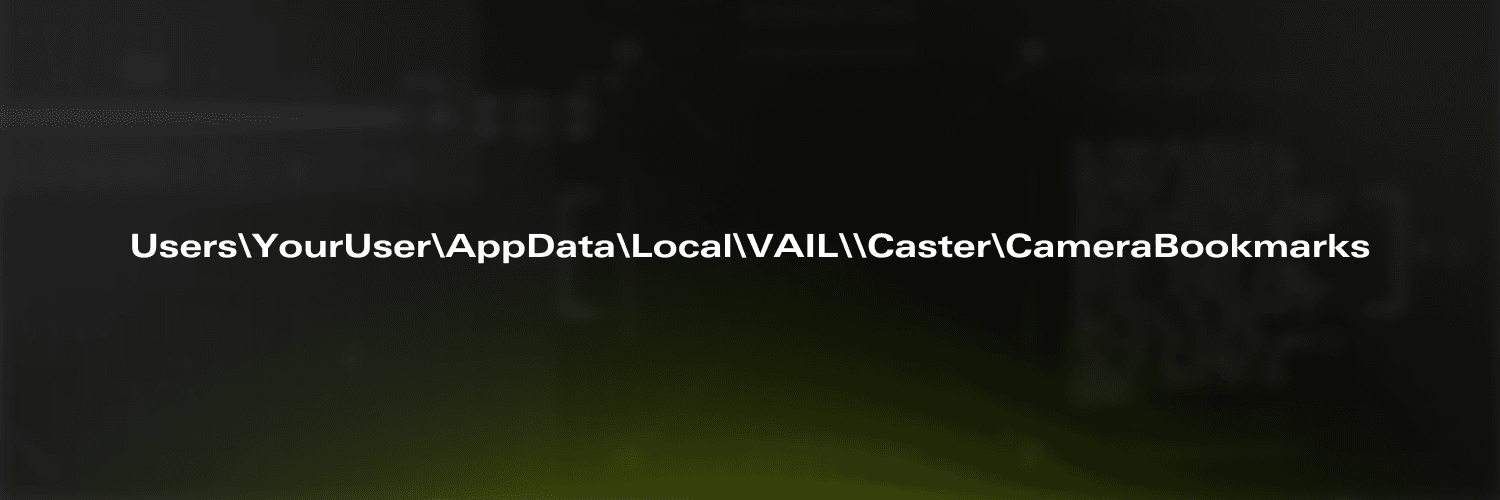
Inside this folder will be the JSON files for each of the maps where you’ve created hotkeys, and if someone shares some hotkeys with you, just drop the JSON file here in this folder.
If you have any questions, issues, or suggestions on how to make VAIL’s observer mode better, feel free to let us know in our Discord server. And as promised, here’s the final table with all of the key binds.


